Week 5 – The Spawning System

This week I’ll be writing about how I and my group went on how to create a spawning system for our enemies, power ups and anything we might need to add into our game.

I’ll also be writing on how I evolved the system from a something very rudimentary and basic to a more flexible system.

For our game we needed a spawning system that would have to be expandable and flexible.

As this was something I needed to create pretty early on in our project I had to make something that was easy for me to begin and to learn with.

For the very first iteration I barely had a system for spawning enemies as all I did was to put the enemies outside the camera view in Unity at specific point to see how it would look when they came in view of the player.

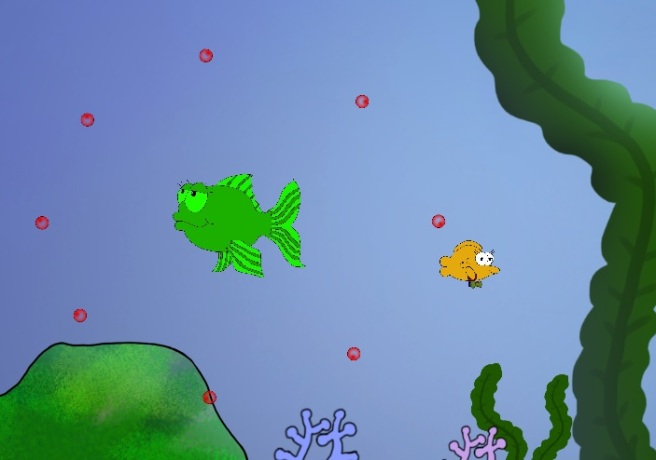
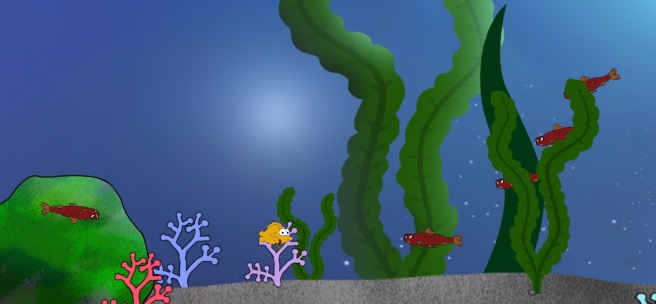
After just testing out how it could look, the second version was to have enemies spawn in endlessly as at that time we needed something to show at our playtesting. What we had was our basic enemy that would only move one direction would spawn in at a random height in the play area but only be moving from the right edge of the screen and move towards the left of the screen.

This enemy would spawn about six at a time and have about three to four seconds between them to clear them out of the game area before new ones came in.

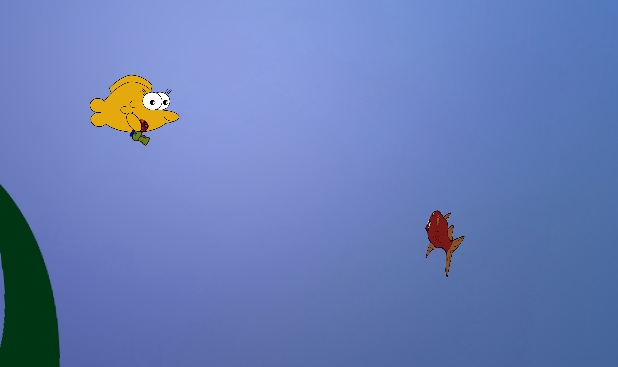
After about two waves of this enemy would have spawned only two of our second enemy would spawn also at a random place at the right edge. As this enemy would chase the player and not leave the game area we had hoped that other people would have an basic idea of how the game played.

This went well as it gave us some ideas on how a very chaotic system would look for handling enemies.

Our game designer had already written down some of his ideas on how the waves would look and what positions the enemies would have.

So I had to improve how the system would work.

Final Wave
The final wave system in Unity

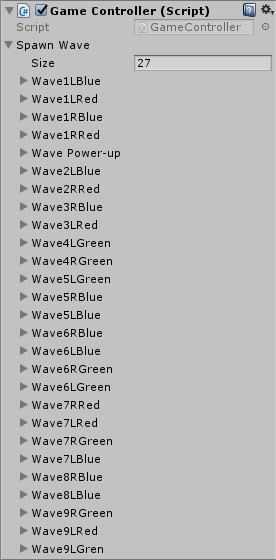
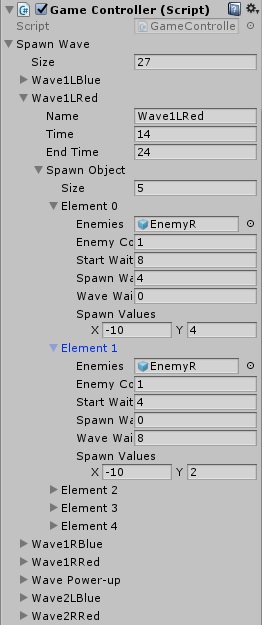
Having a time based system and a system that would be able to be expandable I made a system where you would be able to put in a number in a “for loop” that would place in Unity a list with that many waves and inside those wave you would have to define what times it would begin and end. Inside those waves you could put in a new number for another loop that would define how many enemies would be in it. Here you would be able to define the position for each of those enemies as well as the timing between them.

What it became was a system that was able to be what we needed although maybe a bit to cluttered.

Open waves
Somewaht cluttered but functional.

This is something that I want to improve more as it’s not as flexible as it could be but perfectly usable within our group.

Baloo S. Beckman

Week 4 – The Third Enemy

third-enemy
The Enemy with placeholder sprites

This week I have been working with our third enemy and some small refinements on a few things like making the camera work in parallax and getting knockback on the powerup for the player.

For the third enemy we wanted a much more harder enemy that could shoot and be able to take a few hits from the player’s base weapon.

So the enemy would be big and slow moving as well be able to shoot projectiles in eight different directions.

As the other enemies making it move was just using the same base script of having a velocity in one direction. Having a score value for it was also to just put in a similar script.

So I needed to create an projectile for the enemy to shoot, adjusting a prefab of one of the players bullets I made it so it self would have a set velocity.

The enemy would shoot in different directions so I made spawn point for each of them in Unity and instead of having the bullets have different velocity directions I simply rotated the spawn points at set degrees to have move in the desired direction.

For the code I had to make an instantiate for each spawn point and use the prefab bullet in there.

The spawning bullets would move at a set timer and stop spawning after the enemy was dead.

What took time was calculating which degrees the bullets would spawn at, as the eight directions should have a similar distance between them.

For the health of the enemy, using two if statements to have the health countdown on each hit from the player’s base weapon.

All the values can be easily changed inside unity as the the fire rate and healt number needs to be refined for the final product.

All the parts needs to be destroyed after exiting the playing area so having a script on all of them to be deleted after moving out of a set range was implemented however some of the bullets that got shot out didn’t get deleted so I set up so that after moving out of a collider that is around the whole playing area it would be deleted instead of the other ones..

Making this enemy got me to think about reducing assets for all I’ve done as I realised that you could make different things happen with using the same part and barely change anything.

Week 3 – Second Enemy

For this week I’ll be talking about how I did the second enemy and how I got it to work like I wanted despite some initial problems.

chasing-enemy
The Functioning Enemy.


For our game we needed more enemies and I thought about an enemy that would constantly chase the player until it would kill us or get shot by us. To do this I had to read up on different functions that would be able to do it.

Since I knew that the function of “transform” would be the most relevant thing to start with as it deals with where game objects has it position and rotation in the game.

I found that by using the tag system in Unity i could set the enemy to chase the player by setting a “FindWithTag(Player)” transform and using “transform.LookAt()” that tag.

Using this was successful for the basic movement of chasing the player. At this point I only had placeholder enemies that were 3D objects as it were easier to implement and i didn’t know about how to put in sprites, so at first it seemed to work pretty well.

From the other enemy that only moved straight I had basic movement already functioning but for this new one it didn’t work as well as I wanted. The chasing enemy would fly around the screen at a set speed and fly out of the game area and get deleted when it left the boundary. So what I first did was put in a border script where the enemy couldn’t leave the game area but since the speed was set at a set speed it looked pretty bad as it would crash in a wall and stay there for a while until it turned around towards the player.

I figured out that it was I had a set velocity on the gameobject that it looked so bad and learned that by using “AddForce” instead on the rigidbody of the enemy i could apply both angular and linear drag on the object. With this playing around with different variables I could get a better movement on the enemy as it would slow down after missing the player and turn around much better that before.

However after setting in a sprite on the enemy we saw that with the LookAt function the sprite would rotate 90 degrees so the middle of the sprite was the thing looking at the player and be practically invisible in the game as the sprite doesn’t have a depth or z value.

wrong-angle
The sprite being in the wrong angle.

To fix this I set in a function that would rotate the sprite back so we could see the sprite which I found by using a “transform.rotation” function and using some of Unity’s mathf functions that would change the angle of the sprite.

This enemy was one of the hardest thing to figure out, but I definitely learned a lot from doing it. After getting over this hurdle I started getting more used with working in Unity and how to use it and it’s coding functions.