
For one of our enemies we wanted to start with having a simple behavior that would only move in one direction. The enemy would be moving from right to left and be randomly spawned in on a vertical line slightly outside the main view of the game.
As this would mostly be for learning and having an enemy that wouldn’t do much more than moving straight we decided that having it spawn in endlessly would be a good first step.
The enemy would give the player points for shooting and destroying it.
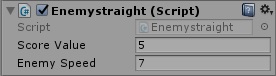
The enemy’s script for moving straight to the right was very easy to create as it only needs a speed and a transform on its rigidbody. In Unity the transform can do several things like scale the object and move it in different directions, among other functions.
Because of this it usually has a “transform.right” or something similar for moving but it doesn’t have a “transform.left” so I simply had to use the former statement and put it in the negative for the enemy to move in the left direction.
void FixedUpdate ()
{
        GetComponent<Rigidbody2D>().velocity = -transform.right * EnemySpeed;
}
The “EnemySpeed” is a public variable that can be changed in Unity.
The enemy also needed be be destroyed and give a score to the player so using Unity’s tag system I set up an if statement that if any collider with the tag of “bullet” would destroy the gameobject and add the scorevalue to the scoremanager we set up earlier.
void OnTriggerEnter2D(Collider2D other)
{
     if (other.tag == "Bullet")
     {
            ScoreManager.score += scoreValue;
            Destroy(gameObject);
     }
}
The simple enemy would spawn in at fixed intervals that could be determined in Unity after setting up a new script that would only handle it spawning.
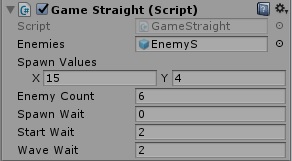
public GameObject Enemies;
public Vector2 SpawnValues;
public int EnemyCount;
public float SpawnWait;
public float StartWait;
public float WaveWait;
Having these in the script we could choose the enemy prefab inside Unity and set up variables that would be needed for spawning in the enemy later.
When wanting to do spawning at set time intervals in Unity you can use StartCoroutine and IEnumerator.
void Start ()
{
      StartCoroutine(SpawnEnemies());
}

IEnumerator SpawnEnemies()
{
      yield return new WaitForSeconds(StartWait);
      while (true)
      {
            for (int i = 0; i < EnemyCount; i++)
            {
             Vector2 SpawnPos = new Vector2(SpawnValues.x,
             Random.Range(-SpawnValues.y, SpawnValues.y));
             Instantiate(Enemies, SpawnPos, Quaternion.identity);
             yield return new WaitForSeconds(SpawnWait);
            }
            yield return new WaitForSeconds(WaveWait);
        }
}
Here is the simple script for spawning endless waves of the enemy you choose in Unity.
So Vector2 here sets up a location on a 2D plane from the values we set in Unity and the Random.Range is pretty easy to figure out as it places the enemy randomly on the vertical plane.
To spawn them in, Instantiate is used and it need the gameobject, the position and a rotation of the object so “Quaternion.identity” is used because it is “no rotation”.
The “yield return new WaitForSeconds” is also pretty easy to see what it does as it set the time between the different wait times you have set up.

This is a very interesting blog post, It’s nice to see the actual code written out like you’ve done (although someone with little to no background in coding might have a difficult time understanding it), you take time to explain what the different lines mean and how they work. As well as pointing out pre-sets that are contained within unity and what they actually do, such as the “transform.right” pre-set.
Which is good for anyone who’s reading as it helps the reader to sort of get into your head, and get an understanding on how, and why you did what you did.
Although I think you, at some point confused right from left a bit, as you describe making the enemy move to the right was easy, but they spawned on the right side and would move to the left? Just an observation.
A tip though, from one coder to another: consider using private variables instead of public ones. Public variables can easily be accessed and manipulated by outside forces, such as other scripts or just third parties in general. Which isn’t something you might want to happen.
Instead consider using the line “[SerializeField]” above a private variable like so:
“ [SerializeField]
Private variable name; ”
Private variables can’t be accessed by outside parties, while the [SerializeField] allows users to access the variable in the inspector like normal. You’ll have to do this to every variable you want accessible in the inspector (meaning you can’t do it once and put a bunch of private variables below it). But it might be better than the alternative.
If you then want to access a private variable you can use “getter” and “setter”. I won’t go too in-depth about them here (as that could be a whole blog post in of itself), and you can easily google about it. But they allow you to both look at and change private variable in specific scripts, inside of specific objects, without putting the scripts “out in the open” so to speak.
So that’s something to think about.
Anyway, great post and good job on the spawning system for the enemy!
LikeLike