Week 3 – Second Enemy

For this week I’ll be talking about how I did the second enemy and how I got it to work like I wanted despite some initial problems.
chasing-enemy
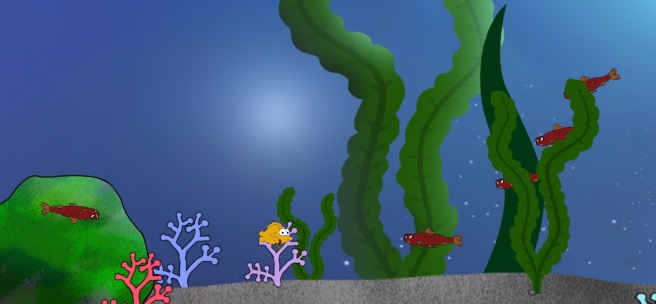
The Functioning Enemy.


For our game we needed more enemies and I thought about an enemy that would constantly chase the player until it would kill us or get shot by us. To do this I had to read up on different functions that would be able to do it.

Since I knew that the function of “transform” would be the most relevant thing to start with as it deals with where game objects has it position and rotation in the game.

I found that by using the tag system in Unity i could set the enemy to chase the player by setting a “FindWithTag(Player)” transform and using “transform.LookAt()” that tag.

Using this was successful for the basic movement of chasing the player. At this point I only had placeholder enemies that were 3D objects as it were easier to implement and i didn’t know about how to put in sprites, so at first it seemed to work pretty well.

From the other enemy that only moved straight I had basic movement already functioning but for this new one it didn’t work as well as I wanted. The chasing enemy would fly around the screen at a set speed and fly out of the game area and get deleted when it left the boundary. So what I first did was put in a border script where the enemy couldn’t leave the game area but since the speed was set at a set speed it looked pretty bad as it would crash in a wall and stay there for a while until it turned around towards the player.

I figured out that it was I had a set velocity on the gameobject that it looked so bad and learned that by using “AddForce” instead on the rigidbody of the enemy i could apply both angular and linear drag on the object. With this playing around with different variables I could get a better movement on the enemy as it would slow down after missing the player and turn around much better that before.

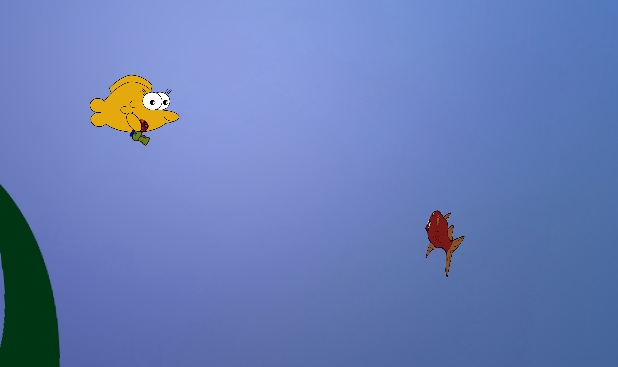
However after setting in a sprite on the enemy we saw that with the LookAt function the sprite would rotate 90 degrees so the middle of the sprite was the thing looking at the player and be practically invisible in the game as the sprite doesn’t have a depth or z value.
wrong-angle
The sprite being in the wrong angle.

To fix this I set in a function that would rotate the sprite back so we could see the sprite which I found by using a “transform.rotation” function and using some of Unity’s mathf functions that would change the angle of the sprite.

This enemy was one of the hardest thing to figure out, but I definitely learned a lot from doing it. After getting over this hurdle I started getting more used with working in Unity and how to use it and it’s coding functions.
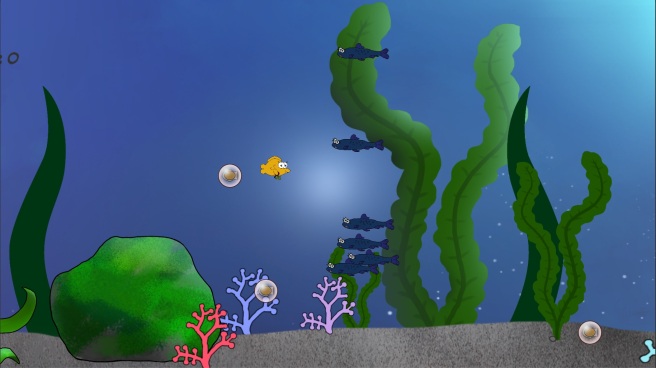
Week 2: The Basic Enemy

enemy

For one of our enemies we wanted to start with having a simple behavior that would only move in one direction. The enemy would be moving from right to left and be randomly spawned in on a vertical line slightly outside the main view of the game.

As this would mostly be for learning and having an enemy that wouldn’t do much more than moving straight we decided that having it spawn in endlessly would be a good first step.

The enemy would give the player points for shooting and destroying it.

The enemy’s script for moving straight to the right was very easy to create as it only needs a speed and a transform on its rigidbody. In Unity the transform can do several things like scale the object and move it in different directions, among other functions.

Because of this it usually has a “transform.right” or something similar for moving but it doesn’t have a “transform.left” so I simply had to use the former statement and put it in the negative for the enemy to move in the left direction.

void FixedUpdate ()
{
        GetComponent<Rigidbody2D>().velocity = -transform.right * EnemySpeed;
}


The “EnemySpeed” is a public variable that can be changed in Unity.

The enemy also needed be be destroyed and give a score to the player so using Unity’s tag system I set up an if statement that if any collider with the tag of “bullet” would destroy the gameobject and add the scorevalue to the scoremanager we set up earlier.

enemyvalues

void OnTriggerEnter2D(Collider2D other)
{
     if (other.tag == "Bullet")
     {
            ScoreManager.score += scoreValue;
            Destroy(gameObject);
     }
}


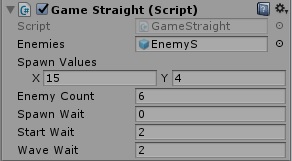
The simple enemy would spawn in at fixed intervals that could be determined in Unity after setting up a new script that would only handle it spawning.

values

public GameObject Enemies;
public Vector2 SpawnValues;
public int EnemyCount;
public float SpawnWait;
public float StartWait;
public float WaveWait;


Having these in the script we could choose the enemy prefab inside Unity and set up variables that would be needed for spawning in the enemy later.

When wanting to do spawning at set time intervals in Unity you can use StartCoroutine and IEnumerator.

void Start ()
{
      StartCoroutine(SpawnEnemies());
}

IEnumerator SpawnEnemies()
{
      yield return new WaitForSeconds(StartWait);
      while (true)
      {
            for (int i = 0; i < EnemyCount; i++)
            {
             Vector2 SpawnPos = new Vector2(SpawnValues.x,
             Random.Range(-SpawnValues.y, SpawnValues.y));
             Instantiate(Enemies, SpawnPos, Quaternion.identity);
             yield return new WaitForSeconds(SpawnWait);
            }
            yield return new WaitForSeconds(WaveWait);
        }
}


Here is the simple script for spawning endless waves of the enemy you choose in Unity.

So Vector2 here sets up a location on a 2D plane from the values we set in Unity and the Random.Range is pretty easy to figure out as it places the enemy randomly on the vertical plane.

To spawn them in, Instantiate is used and it need the gameobject, the position and a rotation of the object so “Quaternion.identity” is used because it is “no rotation”.

The “yield return new WaitForSeconds” is also pretty easy to see what it does as it set the time between the different wait times you have set up.

Week 1: First Post – Player Character

playercharater

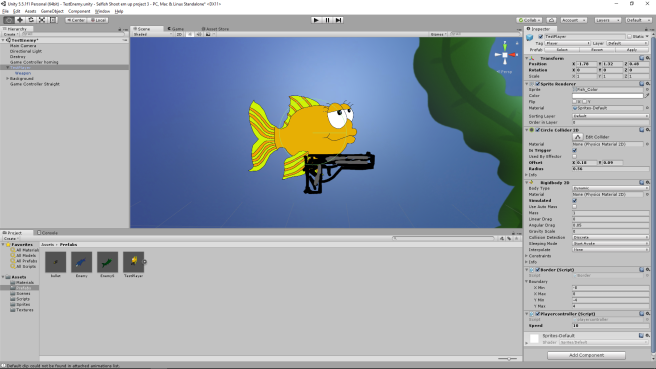
This is the first version of the player character for our shoot’em up game SelFish.
Here I will write about how I put it together in Unity and about the code implemented for it.

After getting a concept images for the character and weapon I changed them to sprites in Unity where I then added the weapon sprite as a child to the character one.

The sprite needed both a collider and a rigidbody2D which was easy to put on in Unity, the circle collider 2D fitted the character the most after having changed the size to fit around its main body.

For the character to be able to move a script was necessary, after researching how a simple script was written.

public float speed;
float moveH = Input.GetAxis("Horizontal");
float moveV = Input.GetAxis("Vertical");
Vector2 movement = new Vector2(moveH, moveV);
GetComponent().velocity = movement * speed;

This is the basics of the code for movement where “speed” is a variable that’s changeable in Unity.

The moveH, moveV = Input.GetAxis is recognizable in Unity to be able to work with the “WASD” and arrow keys to get something moving on the screen.

Vector2 movement takes those inputs for an x and y value in the engine.

The last line takes the values of “speed” and x, y and multiplies them into a velocity on the rigidbody2D that was assigned to the character.

For the player to get a game over a few lines of code where needed to determine when the character would disappear.

void OnTriggerEnter2D(Collider2D other)
{
if (other.tag == "Enemy")
{
Destroy(gameObject);
}
}

This function makes so that any game object that has a collider with the tag “Enemy” will destroy the player game object.

For the player to not get out of bounds in the game area a boundary script was written, this script could be used by other entities as well so it’s a lone script file.

[System.Serializable]
public class Boundary
{
public float xMin, xMax, yMin, yMax;
}

Here we can change the values for the borders on the screen in the Unity engine.

System.Seriazable is needed as Unity does not recognize the floats as it did with the “speed” example above.

public Boundary b;
GetComponent().position = new Vector2
(
Mathf.Clamp(GetComponent().position.x, b.xMin, b.xMax),
Mathf.Clamp(GetComponent().position.y, b.yMin, b.yMax)
);

Here it takes the rigidbody2D from the character and “Clamps” them within the values set inside Unity.

As for the weapon it needed to be able to track the mouse cursor and rotate accordantly.

var pos = Camera.main.WorldToScreenPoint(transform.position);
var dir = Input.mousePosition - pos;
var angle = Mathf.Atan2(dir.y, dir.x) * Mathf.Rad2Deg;
transform.rotation = Quaternion.AngleAxis(angle, Vector3.forward);

Here we take the position of the weapon in the game and changes those values into an x, y location in the camera view. Then takes the mouse position and subtracts the x, y location to get the direction of the weapon.

After that we get the angle on from that direction in a 360 degree axis and lastly set the rotation of the weapon from the angle and rotate around the axis.

Baloo S. Beckman